

Sewing patchwork curtains DIY - Creating a patchwork curtain is not only a fantastic way to introduce vibrant colours and personality to a room, but can also be a sustainable and creative project that allows you to utilize smaller pieces of fabric that you might not of known what to do with. You can mix and match fabrics to complement or contrast with your room's décor. Using fabrics from a particular collection or colour story for a more uniformed look.
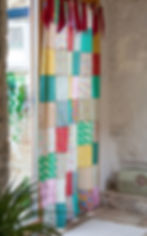
Not lining the curtain allows light to filter through the back which makes the colours pop! Using a French seam to sew the squares keeps the back of the curtain looking neat and hides those raw edges that we don't want to see.

For this project, I've loosely followed the 'tablecloth curtains' sewing project from my Refashion, Restyle, Restitch book. In this book, we give instructions on how to measure your window to work out how much fabric is needed. The amount of fabric needed will differ depending on your window size or the size of curtain you'd like to make.
This curtain ties around a curtain pole so no need to use curtain tape or hoops.
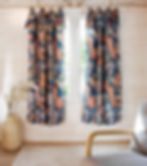
The fabric I've used the Liberty Quilting collection called Woodland Walk. This is a gorgeous autumnal range features little mushrooms, birds and woodland animals and a mix of floral designs all in 3 different colourways. I've used 15 fat quarters of the brighter fabrics from the range for this project. The ties are made from a contrasting plain burgundy cotton.

I've used 54 9.5" squares for my curtain sewn in rows of 6. The finished size of my curtain is 50 x 75".

Before sewing, arrange the squares out on the floor or on a large table to decide the layout and positioning of each print.
Starting with the first row, sew each square together using a French seam.
To sew a French seam, place the first two squares wrong sides together and sew using 3/8" seam allowance.

Trim the seam allowance back by half.

Place the squares right sides together and press. Sew again using 1/4" seam allowance this time.

Open and press.
If you have some of the raw edges still showing, sew the seam again but slightly deeper.
This technique encases the raw edge of the fabric in the seam, making it neat from the front and back!
Continue sewing the squares together in this way and repeat with the other rows.

Sew the rows together using the same technique.

Hem the entire edge of the curtain. To do this, fold the raw edge of the fabric under by 1/4" and press. Fold under again and press or pin in place. (You may wish to use a seam gauge or ruler to make sure the hem is straight).
Sew in place and press to finish.
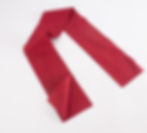
Sewing the ties -
Each piece of fabric for the ties measures 7" x 31". Cut as many ties as would be needed for your curtain. I've used 7 ties.
Fold the rectangle of fabric in half widthways with right sides together and press.
Trim the ends of the tie to a point. To do this, use a ruler with degree lines and cut an angle of 45 degrees (I've used the Olfa frosted quilting ruler). Sew using 1/4" seam allowance and leave a turning gap of about 5" in the side.
Trim off the points of the tie inside the seam allowance, being careful not to cut any of the stitches.

Turn the tie right side out, making sure to poke out the points and press. Use a slip stitch to hand sew the turning gap closed.

Repeat with the remaining ties.
Fold the ties in half lengthways and place evenly across the top of the curtain. Sew in place just below the curtain hem and you are finished! Tie the ties around the curtain pole to hang.
I hope you enjoy sewing your own curtain for your home!
Happy sewing, Kym x
(fabric gifted)